Thursday, 21 April 2016

Bibliography

http://www.history.com/topics/industrial-revolution
http://www.slideshare.net/neledepauw/social-class-and-values-in-the-victorian-era
http://www.thebeautybiz.com/87/article/history/beauty-through-ages-victorians
Ariel Beaujot, 2012, Victorian Fashion Accessories
Marsh Medeliene, 2009, Compacts and Costmentic, Beauty From Victorian Times to the Present Day
http://scienceline.ucsb.edu/getkey.php?key=2927
https://uk.kryolan.com/search/product/blood
http://www.bl.uk/romantics-and-victorians/articles/gothic-motifs
http://www.usask.ca/english/frank/gothtrad.htm
http://www.english-heritage.org.uk/visit/places/netley-abbey/history/description/
http://epublications.marquette.edu/gothic_sexuality/
http://www.tate.org.uk/whats-on/tate-britain/exhibition/gothic-nightmares-fuseli-blake-and-romantic-imagination/gothic
http://theliterarylink.com/uncanny.html
https://en.wikipedia.org/wiki/Ernst_Jentsch
http://www.u.arizona.edu/~atinkham/Sublime.html
https://en.wikipedia.org/wiki/Augustus_Pugin#Palace_of_Westminster#
http://www.whizzpast.com/victorian-hairstyles-a-short-history-in-photos/
http://thehistoryofthehairsworld.com/hair_19th_century.html
http://bartoscollection.com/vehairstylesbyera.html
http://hellogiggles.com/make-up-a-history-the-victorian-era-gibson-girl-style/
http://www.victoriana.com/Victorian-Hats/
https://en.wikipedia.org/wiki/Godey%27s_Lady%27s_Book
https://en.wikipedia.org/wiki/Industrial_Revolution#Standards_of_living
http://www.bbc.co.uk/academy/production/article/art20130702112136285
http://www.gentlemansemporium.com/1870-victorian-photo-gallery.php
http://www.m.webmd.com/skin-problems-and-treatments/guide/bruises-article
https://www.tastekid.com/like/Dorian-Gray

http://www.healthline.com/health/burns#First-Degree3


Evaluation

My project theme was Gothic Horror and I thought this would be an interesting topic for this next term as I want to go in to prosthetics next year.
I really liked the technical lessons with Sue as she taught us and advised on using the products, different techniques and what we could use and do with them the best we could. I think Sue is a very good teacher as she has experience and a lot of her advice is always taken on board.
The new techniques I have experienced are learning different ways of using prosthetics. The products we used I didn’t know you could use to create what we did. Like the fullers earth which I know is for face masks to create mud and the effects on the skin it has are great.
I would like to develop in cuts and scars on the skin, I think more practice makes perfect but I would like to create something that looks amazing, whereas right now I know I have further to go and a lot more to learn. I also know, from Sue’s advice that I need to look in the mirror more, as you see in the mirror what the camera sees – so I need to do that more often.
Throughout the project I saw a lot of articles on the makeup artists who worked on the Revenant film, I also went to go watch Deadpool in IMAX and the scarring is incredible. I have looked more at films and TV programs that contain blood and gore and I am more interested in how those things work as to how gory they are supposed to look to the audience.
They have influenced my work because I want to grow and develop to be able to create something like that. So in my practical lessons I always try my best to create something that looks good and getting a good skill set behind me too.
The technique I liked the most was the ready-made gelatin cuts, I liked these because they are easy to make, easy to stick on to the skin and you can continuously make the same cut or scar. I like working with gelatin as I like how easy is it to use and how it sticks and moves with the skin.
I feel the most successful part of my project was shooting my images, I love doing the hair and the makeup, setting up the studio and actually being able to shoot my own images. They look professional, they look good and the editing process is fairly easy too. I always get complimented on the images I show people in person or on social media and I would say I am most pleased with the images I produce – showing off my makeup and hair skills as well as photography.
The only problems I encountered was deciding what TV program I wanted to base my characters on, deciding on just one program was hard for me as I loved the majority of them. I also think trying to make up a character to fit in to the program was hard too because you want it to sound realistic and then create a look for the character. Once I had my idea I felt a lot more comfortable on producing the characters. I also struggled to find models for this term to0, but I managed to find models and get my images how I wanted them.

If I was to do this project differently I would have picked a different TV program that I hadn’t seen, to push myself. I also would have picked a different book for my first part of the brief. I loved Dorian Gray but when I heard about the actual story of Dracula I wish I had chosen that one. I didn’t pick Dracula because I thought it was a very common story and I wanted to pick something different – whereas now I know what the actual story is I wish I had picked that one. 

Final Images Of Claudia & Quentin

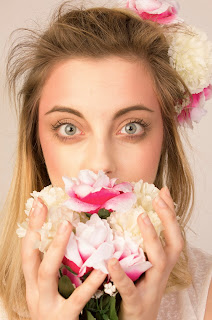
These are my final images of Claudia and Quentin, there wasn't much editing to do on the images as they were ok as they were. The only thing I needed to change was the brightness and a few other things to get the dullness on Quentin and the brightness on Claudia.

Quentin 


Claudia


Images Of Claudia & Quentin

Today I did both my photo shoots on my characters in the studios at uni.

Quentin I shot in a dark studio with one really dim light, a black background and black flooring too.
I was really happy with how the images came out and here are a few of my favorite ones -


I also did my photo shoot for Claudia too, I shot this in the studio too with a plain white background and two bright cameras facing my model to get a bright impact on the model.
I'm really pleased with how they came out and here are some of my favorite images before editing -


 Reflection 

I feel everything in my shoots went really well, the studios were great, the set ups were great, the lighting worked just fine and I didn't have any problems with any set ups.

I love the way the images came out for both character, the dark and gloomy look for Quentin came out really well and the bright and flowery look came out good too.

The only problem I had was with the gelatin on Quentin's neck, the necklace must have been too heavy for the gelatin so applying it laid down would have worked better but I wasn't able to place the gelatin in the studio as that would have been too messy.

Overall, there is nothing I would change about either of the looks apart from the gelatin not keeping the necklace on the neck properly but that is a situation that cant be helped.

Photo Shoot & Final Ideas

Claudia

For my final shoot on Claudia I am going to photograph her in the studio.
I have chosen to do this as I want everything white - to match my key word white rose. I think the white background, really bright lighting, white clothing, and the white rose will all add to the mystical look of the make up, the hair and the facial expression I want my model to have.

I feel the all white will be a sign of how pure and innocent she is, but her make up and her whole look will tell a different story showing she is actually a little crazy. I chose these designs because they link to my character being slightly crazy but but she still looks very cute too.

Here is my final mood board, final face chart and final hair chart fro Claudia -


Quentin 

For my final photo shoot on Quentin I am going to photograph in the studio.
I have decided to do this because I feel if the background and the flooring was black, I can still get my model to lay on the floor but the darkness and the soft lighting would make a really good impact on the look of the character.
The background will be black, the lighting very soft, the clothing will be black and all the skin will be paled out with chains and gelatine on the neck and wrists.

I have chosen these designs because they link back to my character the most, looking sluggish and pale yet the hair still playing a part in being stylish too.

Here is my final mood board, final face chart and final hair chart for Quentin -


Quentin Make-up & Hair Designs

For Quentin I want to produce a character that is like a dying vampire, I don't want to go too over the top but I want to make him look sad and hurting.
Here is my mood board for the idea that I have -


This is my first face chart - 

My first design is basically all white all over the skin, there will be a little contouring on the face to show the despair and the deadness in his face too. The tear will be fake blood and the chain around the neck will be stuck on with gelatine too, so you can see the gelatine just around the chain so it looks like its soaking in to the skin.

My second design is also very basic as he is dying and very sluggish looking his face will be contoured dark to emphasise the cheekbones and the eyes will be dulled out too. The gelatin will be plaved on the neck underneath the silver chain and will be reddened out to make the skin look sore.
This is my favourite design as it looks and relates more to my TV programme I've chosen - True Blood. With the chain on the neck the place skin and sluggish looking face.

My third design is very similar to the second but there is more gelatin and chains on the face. The skin will be paled out and contoured to look sluggish, the eyes are too. The chains will go across the forehead and across the chin area too - secured with gelatin and reddened to make the skin look sore.

Here is a mood board for the hair inspiration I had -

These are my hair charts too -

The first look is the hair in a fashionable side partin but his hair is messy and spiky - he has been used and abused to the messy look would work well for the character.

The second look is the hair all scrapped backwards off the face in a slick quiff - even though he has been used and abused the hair all slick back gives Claudia a better look at his face that she loves to look at. It is also very stylish and sleek which Quentin is.


The third look is very similar to the first design but the hair will be sleek and in place rather than messy and spiky. The character is very good looking and the hair is a big part of his looks so keeping him looking nice is what Claudia likes - even though she is killing him she still wants him to look "good".
This is my favourite design and I like how it links back to the character the most - keeping him looking good and sleek when he is about to die is probably what most people want anyway. 

Sunday, 3 April 2016

Sweat & Fever

Today in lesson I learnt how to make the skin look sweaty and feverish using products over the make up base.

Health and Safety 
Follow all health and safety guide lines making sure the client is ok during the process of the application of the glycerine and make up if using the alcohol to dilute the Supra colour
Make sure the client has no allergies and keep eyes shut when working near or around them

What I Used 
- Red Supra colour
- Alcohol
- Sponge
- Make up brushes
- Glycerine

What I did 
1. My model had make up on her skin - a foundation and powder base, instead of taking it off I wanted to see what it would look like over the make up.
2. I got some red supra colour and diluted it down with some alcohol to make the colour more translucent.
3. I blotted the red colour on the skin where the skin would usually go red if you had a fever - around the cheeks, the forehead and a little on the temples.
4. I used a brush to apply that and also my fingers to get it into the skin to make it look more natural.
5. I put some glycerine in to a bowl and blotted my sponge in to it, I then dotted the glycerine over the redness and also over the top lip where you would usually get a but sweaty if you was ill.

This is the finished look -


Reflection 
I really liked the outcome of the look, as I wasn't sure if what I had done look natural enough but it did look really good.
I was surprised with how well the glycerine on the skin actually looks like sweat too and the redness on the skin makes it look more real.

I wasn't diss pleased with anything I did on my client as I think it turned out well. I would maybe do it again on normal skin with no foundation or product on underneath.

Overall, I am pleased with the outcome and the results I produced and I love the effect that the glycerine has on the skin.